Pages

Thursday 28 July 2011

sichuan-inspired dan-dan congee

It has been awhile since I last signed up for one of the always fun, and always challenging International Incident Parties hosted by the lovely Penny at Addictive and Consuming. This month's theme? Sichuan cuisine. Bang!

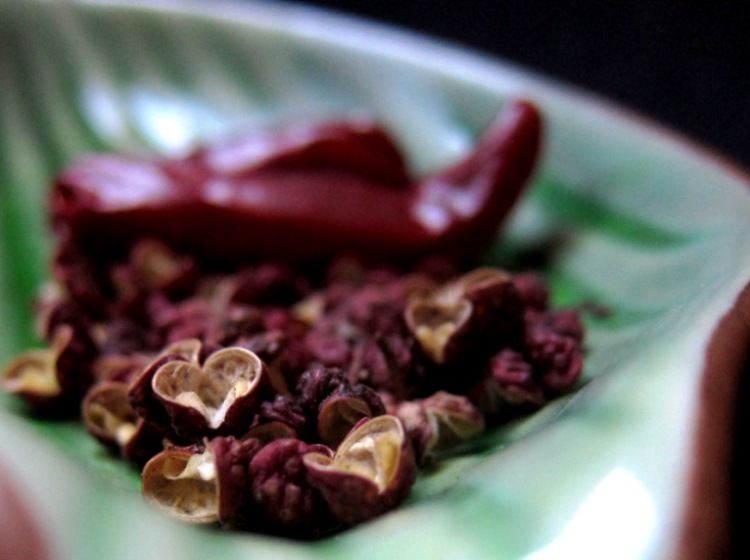
sichuan peppercorns and dried chillies.

I love my food hot, I love it spicy. But I've never attempted to cook Sichuan food. I immediately turned to an impulse purchase I made several months ago - a cookbook by Iron Chef Chen Kenichi, titled Iron Chef Chen's Knockout Chinese. I rarely use cookbooks, and I've never used this one, but who better to take as a guide other than Iron Chef Chen, the sage of Sichuan cuisine?

iron chef chen's knockout chinese!

Iron Chef Chen's Knockout Chinese doesn't actually feature many traditional Sichuan dishes. However, I did find one for dan-dan noodles. I tweaked a few of the ingredients, swapped noodles for rice, and came up with... an Iron-Chef-inspired dan-dan congee.

zha cai (chinese preserved vegetables)

sichuan-inspired, iron-chef-adapted: vegan dan-dan congee (serves 2)

for the congee:

3/4 cup rice
6 cups water

Wash, rinse and drain rice a few times. Bring rice and water to boil in a pot, then simmer, partly covered, for about 45 minutes or until it reaches your ideal texture and consistency. During this time, stir regularly and add more water if necessary.

for the sichuan-style dan-dan congee topping*:

2 tablespoons peanut oil, or other vegetable oil
1 teaspoon Sichuan peppercorns
1 teaspoon finely chopped dried chilli, or chilli flakes
1 teaspoon finely grated ginger
2 tablespoons Chinese sesame paste
2 tablespoons soy sauce (I used a mix of light and dark)
1/2 tablespoon rice vinegar
1 tablespoon finely chopped zha cai (Chinese preserved vegetables) + more to garnish
1 tablespoon finely chopped spring onions (aka scallions) + more to garnish

Heat up peanut oil in a pan, then throw in Sichuan peppercorns, dried chilli and ginger. Let it cook gently for 2 minutes or until ingredients are starting to turn brown and the oil takes on colour and flavour.
Strain the oil, and whisk with the rest of the ingredients until well-combined.
Drizzle onto congee and scatter with more spring onions and preserved vegetables.

*You should be able to find all these ingredients in a comprehensive Asian grocery store. I've never bought zha cai before but I picked up a brand called Yuquan, which comes in a green packet, and I think it worked nicely. If you can't find Chinese sesame paste, you can try mixing 3 parts tahini or peanut butter with 1 part Chinese sesame oil.

I was pleased with the dan-dan sauce - full of sass and flavour, it was a perfect pairing to plain congee. The fragrant Sichuan peppercorns and dried chillies imparted a gently numbing heat; the zha cai was salty and pungent. The nuttiness of the sesame paste was lightly offset by the acidity of the rice vinegar. Everything worked together, and they worked with the congee to create a humble, warmly inviting dish that added a little perk to my day. A satisfying success!

my sichuan-inspired dan-dan congee.

go get your spice on!

Click here to read the rest of the post!

Saturday 23 July 2011

smoked salmon pasta salad with grapefruit yoghurt, almonds and coriander

Some food bloggers out there have great stories that come with their recipes. Idyllic musings inspired by exotic locales. Nostalgic memories about grandmothers who made the best apple pies. Beautiful, poetic stories that just reach out, and bring about a wistful, collective sigh amongst their readers.

From trash to treasure... smoked salmon pasta salad with grapefruit yoghurt, almonds and coriander.

Reflecting upon that, I wish I could give this tangy, creamy smoked salmon pasta salad a nicer story. Alas, it really only came about because there were a number of ingredients in the fridge that needed to be used up quickly before they went off.

Me: Simon, how long has this smoked salmon been sitting in the fridge?

Simon: Um, I dunno... a few days?

Me: I think you're supposed to eat these things within two days of opening. Besides, I thought you don't even like salmon. Why did you buy it?

Simon: I don't. And I didn't. Kelvin brought nibbles the other night when he came over to hang out, and these are leftovers.


Hell-bent on not wasting the pitifully neglected smoked salmon, I rummage through the fridge, and I found half a tub of Greek yoghurt that was also on the verge of expiry. I found grapefruit that Simon's housemate gave him before she went travelling. I found coriander that was starting to look just a little tired. I also found penne lisce and slivered almonds in the pantry - these were, happily, in considerably better condition than their refrigerated friends.

I put them all together to dish up this surprisingly delectable smoked salmon pasta salad with grapefruit yoghurt, almonds and coriander.

Crisis averted. Lunch created. Mission accomplished.

I guess it's not such a bad story after all.

Healthy and delicious! Smoked salmon pasta salad with grapefruit yoghurt, almonds and coriander.

smoked salmon pasta salad with grapefruit yoghurt, almonds and coriander
(serves 2 - 4)


2 cups penne lisce (smooth-sided penne)
1/4 cup slivered almonds
1 cup greek yoghurt
2 cloves garlic, minced
1/4 cup fresh grapefruit juice
1 tablespoon extra virgin olive oil
100g smoked salmon, roughly torn
1/4 cup roughly chopped fresh coriander
sea salt and freshly ground black pepper, to taste

Cook the pasta according to packet directions until al dente, then rinse under cold running water and drain well. Set aside.
Lightly toast slivered almonds by gently frying in a pan until golden and fragrant. Set aside.
In a bowl, combine yoghurt, minced garlic, grapefruit juice and extra virgin olive oil.
Stir through smoked salmon, coriander and toasted almond slivers.
Season to taste with sea salt and cracked black pepper.
Add the cooked pasta and mix well, then re-adjust seasoning if desired. Serve.

Click here to read the rest of the post!

Monday 18 July 2011

cinnamon apple muffin cake

Life has been hectic lately. Work, extracurricular activities and social commitments swirl madly through my days, and inevitably, some things fall by the wayside.

This blog post is one such example. I tend to write a rough draft of my recipe ideas first, then do the fine-tuning as I trial them in the kitchen, updating my notes as I go; a method that usually works well. For this particular blog post, however, all I could find was my original recipe draft, so I've had to piece that together with my memories of the afternoon to recollect the ingredients and steps I added along the way... so you can see how this could, in fact, turn out to be not a recipe for cinnamon apple muffin cake, but rather a recipe for disaster. However, with a bit of work, I'm pretty sure I've finally got this right. Yes!

Folding in the sweet, buttery, cinnamon-spiced apple cubes.

This cinnamon apple muffin cake is yet another one of my simple mini loaf creations. I created it especially for my friend Kelvin's housewarming party, where, to my delight, it was enthusiastically finished by the guests in no time at all.

The secret? I lovingly cooked the apple cubes in a lush, sigh-inducing mix of butter, sugar and cinnamon before folding them to the batter. Yeah, it was hard to go wrong from there onwards...

mini cinnamon apple muffin cake
(mini loaf pan dimensions: 18cm (l) x 10cm (w) x 5.5cm (h) exterior, 15 x 8 x 5.5cm interior.)


for the cake:

1 medium apple, peeled, cored, and chopped into 1.5cm/0.5 inch cubes
1/4 cup butter, plus more for greasing
1/3 cup sugar
1 teaspoon ground cinnamon
1 cup self raising flour (or 1 cup flour + 1.5 teaspoons baking powder)
1 large egg
1/3 cup milk
1/8 teaspoon salt

Pre-heat oven to 180C fan-forced, or 200C regular.
Simmer apple cubes, butter, sugar, cinnamon together over a low medium heat for 5 minutes or until just tender. Remove from heat and set aside to let it cool slightly.
Place self raising flour in a bowl and make a well in the centre.
In another bowl, lightly whisk egg, then add milk and salt. Continue whisking till well combined.
Pour eggy milk mixture into the centre of the bowl with the self-raising flour and stir through gently a few times until just combined.
Pour in the apple mixture. Again, stir until just combined, taking care not to overmix the batter.
Grease the loaf tin with butter. Pour the batter in and smooth the top.
Bake in the oven for approximately 30 minutes or until the crust is a lovely golden brown.
(Note: You may also bake the batter in muffin moulds, and if so, they should be done in 20 - 25 minutes.)
Remove from oven and cool on a rack for 10 minutes, then lightly run a knife along the edges of the tin and tip the cake out onto a serving plate.

for the cinnamon syrup glaze:

1/4 teaspoon ground cinnamon
2 tablespoons raw sugar
3 tablespoons water

Combine cinnamon, sugar and water in a saucepan and bring to a boil, stirring until all the sugar has dissolved, then simmer for another minute.
If you're planning on keeping this cinnamon apple muffin cake for later, brush cinnamon syrup liberally all over the cake and let it absorb before storing. Alternatively, if you're planning to eat the cake while it's still warm, just slice and serve with a drizzle of the syrup.

Enjoy!

my cinnamon apple muffin cake, waiting to be turned out, glazed, and enjoyed with friends...

Click here to read the rest of the post!

Sunday 10 July 2011

sweet, savoury, spicy peanut sauce dressing

This peanut sauce came into my life at just the right time. I had almost forgotten how awesome a thick, creamy, warm and spicy peanut sauce can be, and this one certainly served as a reminder of what I've been missing out on all this time. It's simple, but it really hits the spot. If you're ever in need of a salad dressing that encourages you to eat your vegetables, give this sweet, savoury, spicy peanut sauce a whirl. It had me gobbling up all those leafy greens in record time... and I was asking for more by the end of it.

If you've not attempted your own peanut sauce before, this basic recipe is an easy one to follow, and I've opted for fairly common ingredients, which means you don't have to make a special trip to the Asian grocery store. So what are you waiting for? Make it. And lick it off the spoon while you're making it.

You know you want to.

sweet, savoury, spicy peanut sauce dressing.

sweet, savoury, spicy peanut sauce dressing

1/2 cup peanuts
1 cup coconut milk
2 long red chillies*, chopped
1 clove garlic, minced
1 teaspoon salt
1/2 tablespoon raw sugar
1 tablespoon lime juice
subtle pinch of powdered spices e.g. cinnamon, nutmeg, ginger, coriander seed (optional)

Toast peanuts in a pan until fragrant. Move them around constantly in the pan when toasting so that they don't burn.
Combine toasted peanuts, coconut milk, chillies, garlic, salt and sugar in a blender or food processor and blitz until it forms a mostly smooth mixture (I like mine with a slight hint of chunkiness).
Transfer to a saucepan over medium heat. Simmer for 10 minutes, stirring frequently, until the sauce is thoroughly warm and the flavours are coming together beautifully. If it becomes too thick, add a little more water or coconut milk.
Add lime juice and spices to taste, if using. Remove from heat and it's ready for consumption!

*The chillies I used are moderately spicy. Adjust the amount of chillies you use according to their individual spiciness, and personal preference. You may also tone down the heat by removing their seeds before using.

Use this peanut sauce to dress up your salads, splash it into stir-fries, or enjoy it as a dip or marinade. Store any leftover peanut sauce in a covered container in the fridge. It should keep for at least two days. The sauce will thicken and solidify in the fridge, but this is easily remedied by warming it up again and adding a little more water if necessary.

I paired this peanut sauce with a haphazard assortment of blanched vegetables (bean sprouts, cabbage, long beans, baby spinach, bok choy), fried tofu and boiled eggs to create a not-quite-but-almost-traditional version of gado-gado, a delicious salad famous in Indonesia. I ate this on Friday. I ate more on Saturday. I wish I could tell you I ate it today, too, but regrettably, it was all gone. Devoured. Finito. So here I am, reminiscing about my wonderfully nutty weekend, and sharing this blog post with you. Enjoy.

a creamy southeast asian peanut sauce dressing - goes beautifully with salads like gado-gado.

Click here to read the rest of the post!

Sunday 3 July 2011

olive oil and grapefruit cake

I have been baking, and baking often ever since I discovered the joys of having a mini loaf pan.

What are the joys of having a mini loaf pan, you ask?

Well!

Firstly, it's cute.

Secondly, I can experiment to my heart's content without worrying about a massive waste of ingredients in the event of a failure.

Thirdly, it stops me from overeating.

Fourthly, baked goods always seem more delicious when you are left wanting more.

And if it wasn't for my mini loaf pan, I probably wouldn't have bothered baking this light and gentle olive oil and grapefruit cake, which would've been a shame, because it turned out to be a great success.

olive oil and grapefruit cake... a great little snack and lovely with a cup of tea.

The first good thing was seeing my cousin licking the leftover batter in the bowl as we waited for this olive oil and grapefruit cake to finish cooking in the oven.

The second good thing was smelling the cake as it rose and browned in the oven.

The third good thing was tipping the cake out, having it come off cleanly with a gentle thud, then feeling and hearing that gorgeous crackle of the crust as I sliced through it with a knife, sending crispy crumbs a-flying.

The fourth good thing was tasting it, sharing it with loved ones, and, yes... wishing there were more.

a soft, rustic olive oil and grapefruit cake with delicate citrus flavours...

mini olive oil and grapefruit teacake
(mini loaf pan dimensions: 18cm (l) x 10cm (w) x 5.5cm (h) exterior, 15 x 8 x 5.5cm interior.)


3/4 cup self raising flour
1/4 cup raw sugar
1 large egg
1/4 cup freshly squeezed grapefruit juice
1 teaspoon grapefruit zest
3 tablespoons olive oil
1 pinch salt

Preheat oven to 180C fan-forced (200 regular).
Combine self-raising flour and raw sugar in a bowl. Make a well in the centre. Set aside.
In another bowl, lightly whisk egg, then add grapefruit juice, zest, olive oil and salt. Continue whisking till well-mixed.
Pour the wet ingredients into the well of dry ingredients. Stir together until just combined - do not overmix.
Pour the batter into a greased mini loaf pan (or other mini cake pan) and bake in the oven for approximately 25 minutes or until it boasts a lovely tan.
Let the cake cool slightly for 10 minutes, then remove from pan, slice and enjoy the cake by itself or with a nice cup of tea.

Click here to read the rest of the post!